Adding Locations and How to Update Contact Information
In Enterprise Web 2.0, Locations are no longer part of the “Hours” block - they exist in a section of concrete5 called “Express” where you can manage all your Locations centrally. We will be going over adding new locations and managing existing ones on your site.
Adding a Location
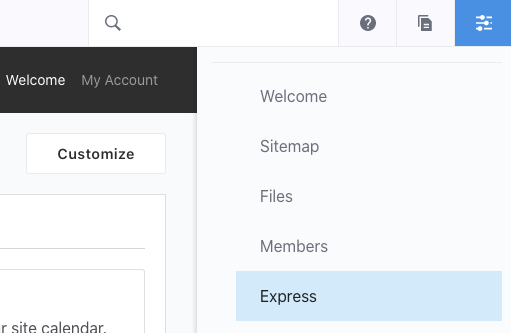
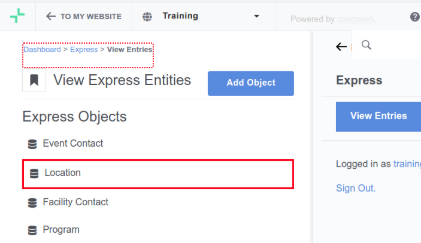
1. Click the dashboard icon in the upper right and choose “Express”.
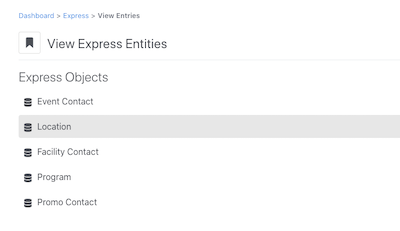
2. On the “View Express Entities” page, choose “Location”.
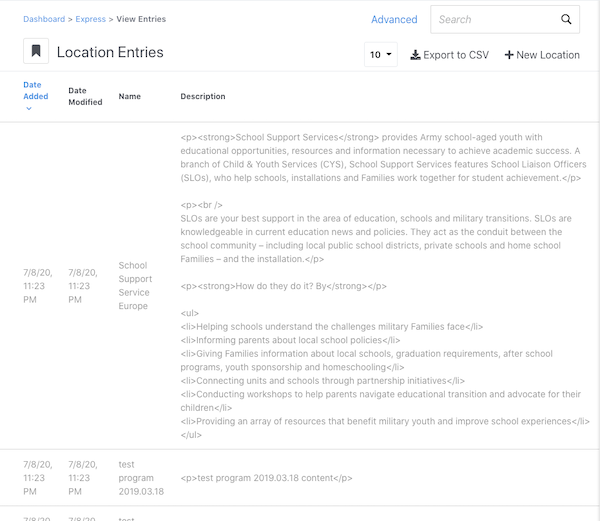
3. This will open the “Location Entries” page
4. Click “+ New Location” in the upper right hand of the screen
5. The page will reload and you will see a form where you can add your new location information. Fill out the following fields:
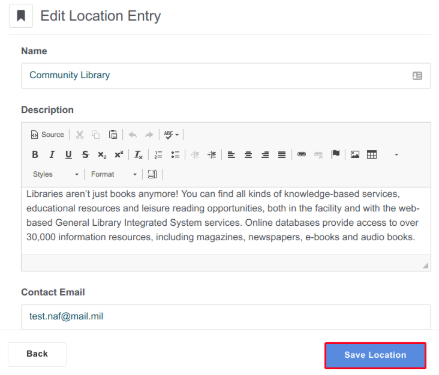
- Name - Location Name
- Description - Location Description
- Contact email - email address of who should be contacted regarding the location.
- Address 1 - Building / Location name
- Address 2 - Building Number or Street Address
- City - City of Location
- State/Province - State or Province of Location
- Postal Code - Postal code of Location
- Latitude - Latitude coordinates of Location
- Longitude - Longitude coordinates of Location
- Google Map Search Mode - This allows you to specify how Google should try to search for this address in order to plot it on the map. There are three options:
- Send the full address - sends everything in the address fields to Google for it to decide where to plot.
- Send latitude / longitude - sends the latitude and longitude to Google - sometimes this is a better option for locations Google can’t seem to find correctly.
- Use a custom string - This sends a “string” (a string of characters in this case) to Google to plot. Basically this allows you to send Google whatever custom text you want if you’re having trouble getting your location plotted correctly to see if you can get it to plot more accurately. This likely will not need to be used very often.
- Telephone - the telephone number of the Location.
- DSN Phone - the DSN phone number for the Location.
- Hide Hours - check this box to not display the hours for this location
- Open 24 hours - check this box to show a message that the location is open 24 hours
- Notice Text (Optional) - Include text in this field if you want a special highlight box to appear with a message for users, such as special information about the location or availability.
- Hours fields - Here you can specify the hours of operation for the Location Monday - Sunday. There are a few things to note with this:
- The time periods are just drop downs with hours and AM / PM
- Filling in “Time Replacement Text” will swap out the hours with the text. This is useful for when standard times don’t apply, such as “Dawn” or “Dusk”.
- Clicking “Add Range” will create another set of hours to apply to the same day. This is useful for if your location closes for a period and reopens on the same day.
- Range description can be used to describe these ranges, such as “Morning Hours” and “Afternoon Hours”.
- Add Day - The Add Day button lets you add a custom day (such as a holiday) so you can include special hours.
- Program - This section allows you to associate the location with programs on the site. Typically, you would do this from the program page and not from this interface.
Editing Locations
There are two ways to edit a location: from the list of all locations and from a program associated with the location.
Edit from the list of all locations
- In order to edit a location, go to the list of locations in Dashboard > Express > Locations.
2. Find the location on the listing page. Use the search bar and/or the table headers to narrow down the locations. Once the correct location is found, select it to view the detail page.
3. Click the “Edit” button in the upper right and that will allow you to make any changes you need.
4. Click the “Save Location” button in the lower right of the screen when you’re finished.
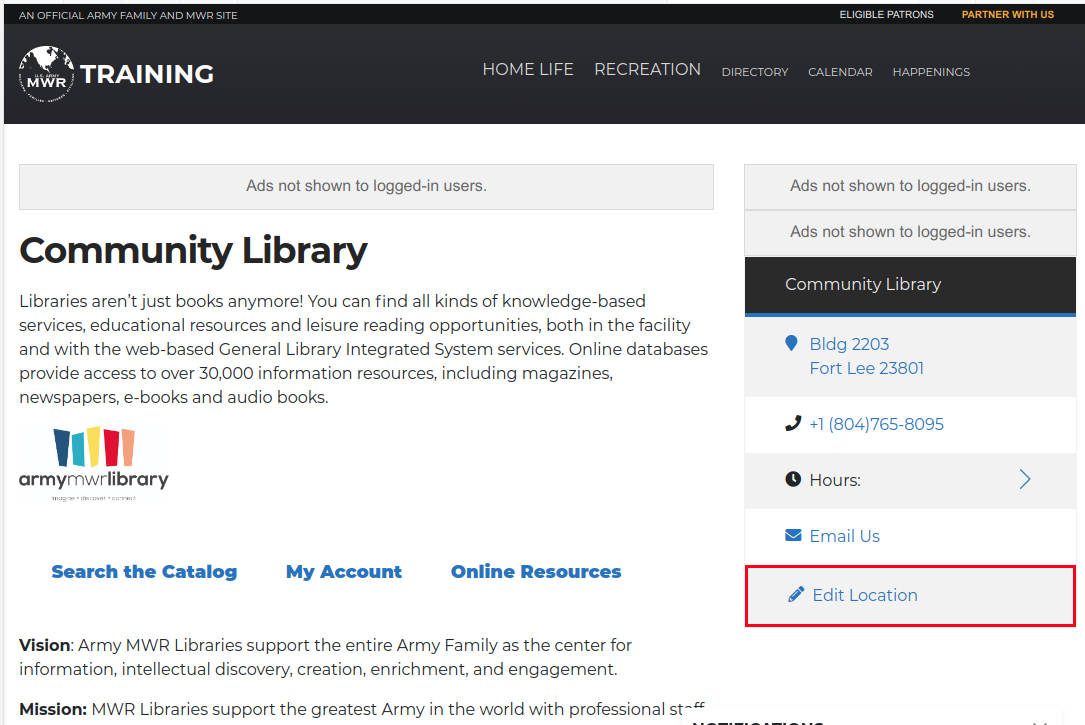
Edit from a program associated with a location
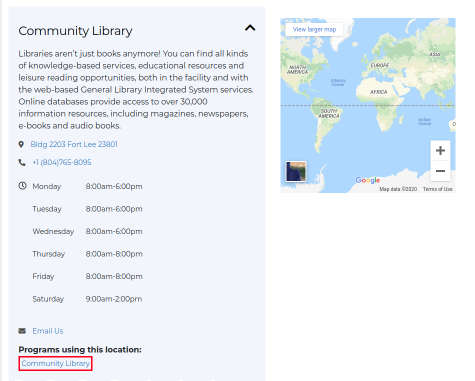
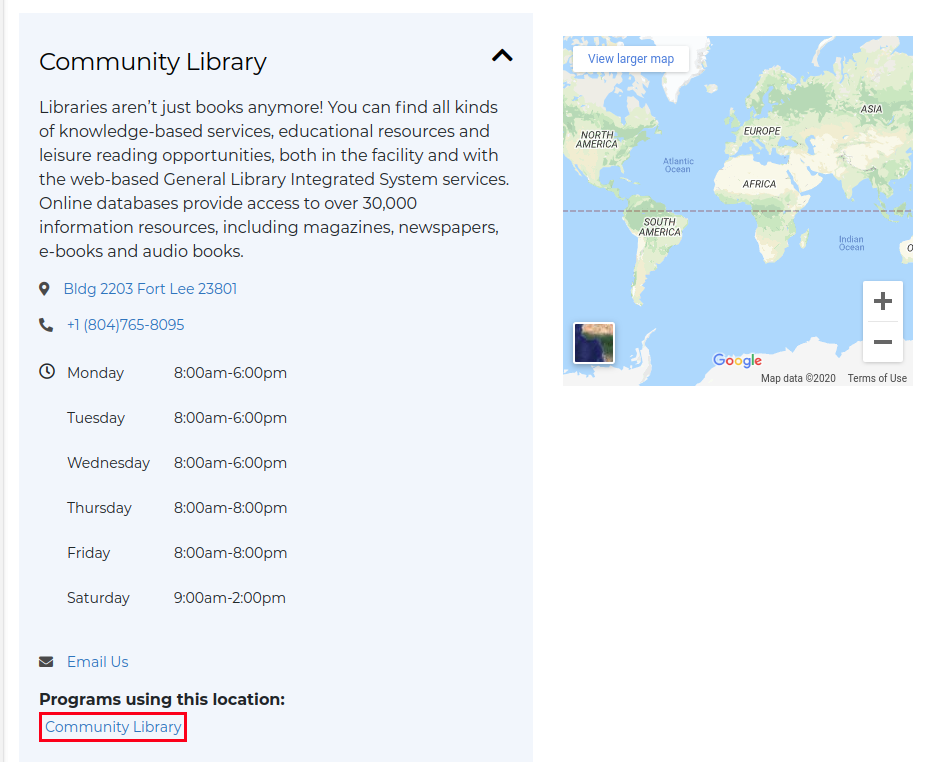
- Use the directory to find the location and select one of the programs using the location at the bottom of the entry.
2. Select the Edit Location link in the right sidebar under the location to be edited.
3. Click the “Save Location” button in the lower right of the screen when you’re finished.
Results
Centralized Locations management makes it easy to create Locations for your garrison quickly and have a central location to find your Locations and update their information in the future.
Troubleshooting
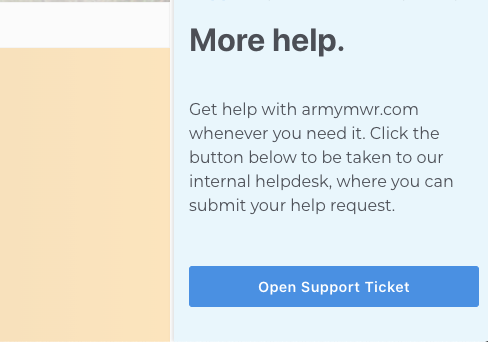
If you have any questions or run into any issues, reach out to the support team by selecting the question mark icon in the upper right in the edit bar on Enterprise Web.
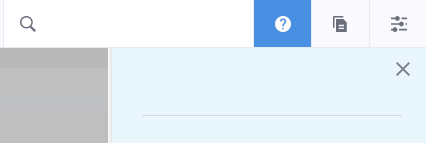
Scroll to the bottom of the blue side menu, past the reference materials links, and select Open Support Ticket button to open a ticket. Someone will get back with you shortly.